Table of Contents
I have been using FiraCode as my font of choice in VS Code since I found about it. The use of ligatures while typing code is handy and has been a game-changer. However, lately, I have seen some VS code screenshots with cursive fonts in the text editor, and I wanted some of that. But, I also wanted to keep the ligatures that FiraCode has already spoiled me with.
Using my googling skills, I found a few articles, and it seemed the most straightforward way was to install a theme with a cursive font already built in such as this. However, I like the flexibility of changing themes, so this was not a viable option for me.
Final Output
Now that we know what we are looking to achieve let's see how to make it happen.
Updating VS Code's settings
My search for a font that encapsulates ligatures and Cursive fonts led me to Fira Code iScript made by Ken Krocken. It combines 2 fonts - Fira Code as the regular font and Script12 as the italic font.
After installing the font on my system, I changed the editor settings to use Fira Code iScript as the first option for font family.
"editor.fontLigatures": true,
"editor.fontFamily": "'Fira Code iScript', 'Fira Code', Consolas, 'Courier New', monospace",
VS Code uses the TextMate grammar syntax to define how it needs to render code. You can read more in the official documentation. In VS Code settings.json, you can override the font style for the current theme by modifying the textMateRules under editor.tokenColorCustomizations.
{
    "editor.tokenColorCustomizations": {
        "textMateRules": [
            {
                "scope": [], // array of Scopes to which the style should be applied to
                "settings": {
                    "fontStyle": "italic" // the font style that should be applied
                }
            }
        ]
    }
}
You might be wondering how to get the scope to put in the above JSON. Luckily, VS code has a command to help us with this - Developer: Inspect Editor Tokens and Scopes. You can trigger this by using the Command Palette (Ctrl + Shift + P) after ensuring that the active cursor is on the token you want to inspect.
The scope inspector displays the following information:
- The current token.
- Metadata about the token and information about its computed appearance.
- Theme rules that apply to the token.
- Complete scope list, with the most specific scope at the top.
The one that we will use is scope list. Whichever token you want to make italic, add it to the scopes in the scopes array.
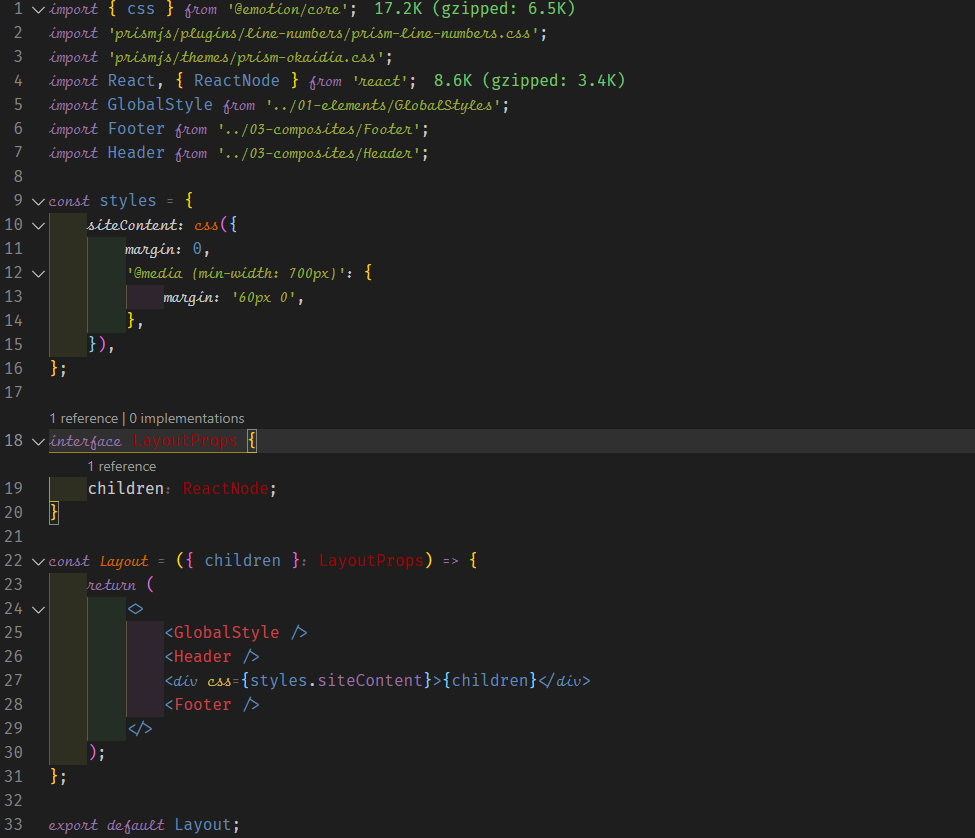
You can see my current config for an example.
My current config
"editor.tokenColorCustomizations": {
    "textMateRules": [
        {
            "scope": [
            //following will be in italic (=FlottFlott)
                "comment",
                "entity.name.type.class", //class names
                "keyword", //import, export, return…
                "storage.modifier", //static keyword
                "storage.type", //class keyword
                "support.class.builtin",
                "keyword.control",
                "constant.language",
                "entity.other.attribute-name",
                "string.quoted.single",
                "entity.name.method",
                "entity.name.tag"
            ],
            "settings": {
                "fontStyle": "italic",
            }
        }
    ]
}
Conclusion
After these steps, I have both ligatures and cursive fonts in my editor.
Thanks
- Daniel de Souza pointed out some changes he needed to make to get it working with a 4K monitor.
- Manjunath Vadigeri for reaching out and letting me know that the steps don't work in the latest VS Code. The article has been updated to reflect the changes.