In this series, I'll guide you through setting up a CI/CD pipeline for Unity projects using GitHub Actions and GameCI.
Part 1 of this series covers the one-time setup that you need for setting up the pipeline.
Note: Some of these setup steps can be skipped if you've already performed them for a previous project.
Acquire an Activation File for GitHub Runners
- Log into Unity Hub
- If you havent already created a licence, you need to get a licence by going to Unity Hub > Manage Licenses > Add > Get a free personal license.
Install Ruby
- Install Ruby
- Verify the installation by running
ruby -v. - Install Bundler by running
gem install bundler.
Setup Codesigning with GitHub Actions
- Create a private GitHub repository to store the certificates and code-signing identities we generate.
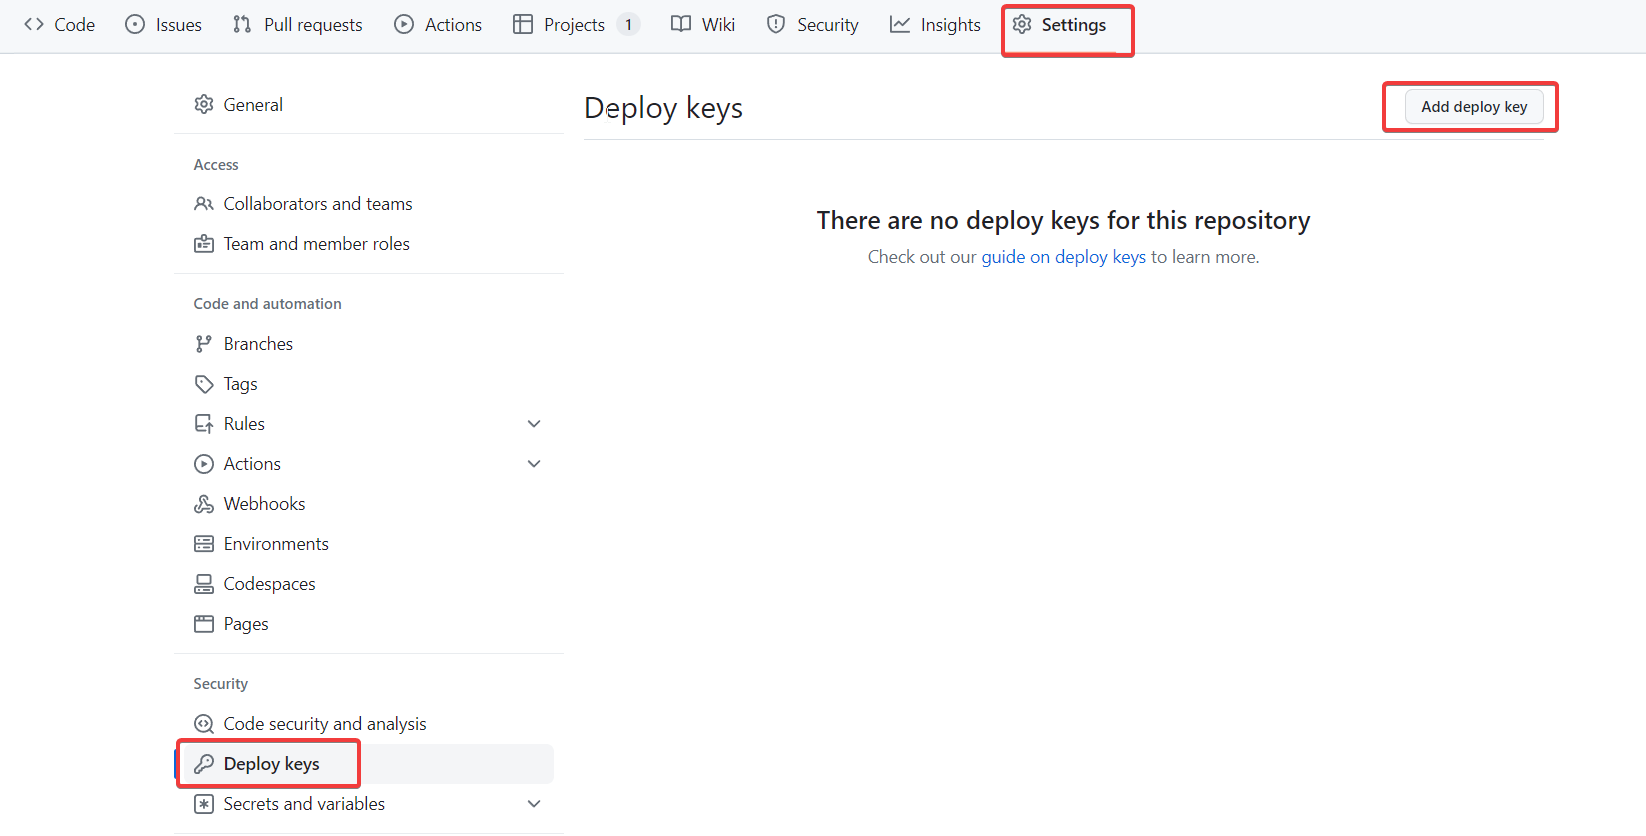
- In the private repository, navigate to Settings -> Deploy Keys -> Add Deploy Key
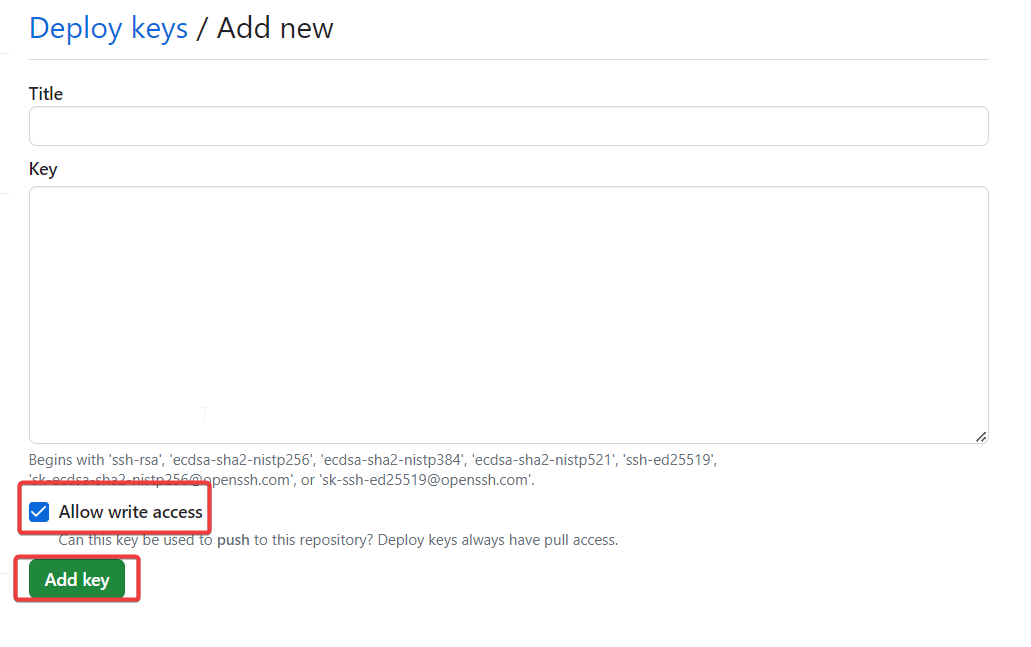
- Generate an SSH key. You can use 1Password or use the
ssh-keygenutility. - Paste the public key (starting with ssh) into the "Key" field.
- Select Allow write access to enable pushing certificates to the repository.
Setting up Secrets for GitHub Actions
On GitHub, navigate to Settings -> Secrets and Variables -> Actions.
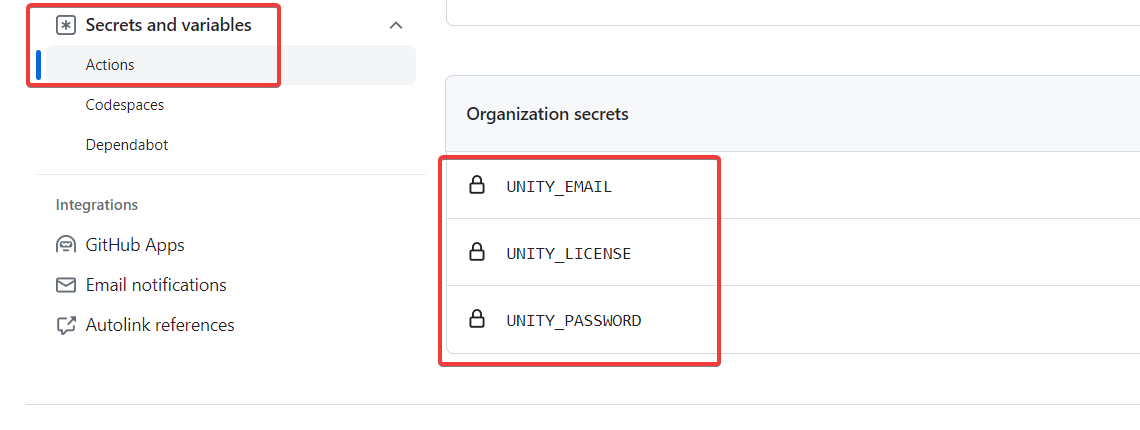
Create the following secrets
- UNITY_EMAIL: Your Unity login email address.
- UNITY_LICENSE: The contents of the .ulf file which can found at C:\ProgramData\Unity\Unity_lic.ulf.
- UNITY_PASSWORD: Your Unity login password.
- MATCH_PASSWORD: This is required for encrypting/decrypting certificates.
- MATCH_REPOSITORY: The name of the private GitHub repository that will store our certificates in the format
organization/repository. - MATCH_DEPLOY_KEY: This is the private part of the SSH key we created in the private repository to store our certificates. If using 1Password makes sure the key is unencrypted.
If you can, I recommend adding these secrets at the organisation level so that you can reuse them across multiple projects. You can then selectively grant access to each secret for specific repositories.
Conclusion
We are now finished with the one time setup that we need to add CI/CD to our Unity projects. In the next part, we will set up the GitHub Actions workflow to build and deploy our Unity project.